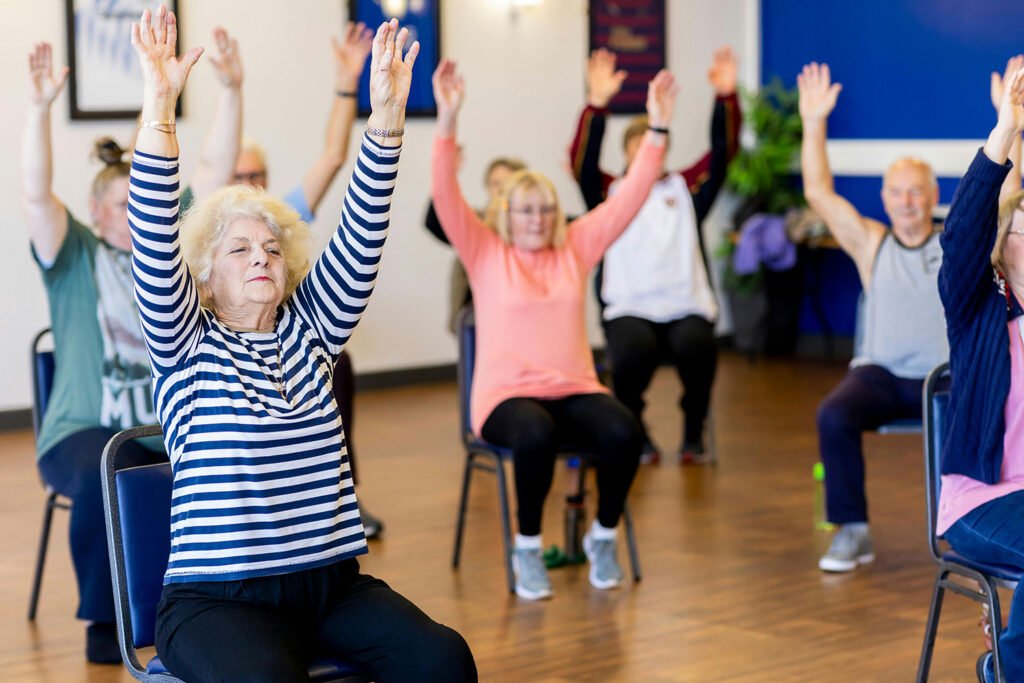
The most common thing I hear from seniors who come to see me about balance is: ‘I know I should do something, but I don’t know where to start.’ So let me give you a direct answer: start here, with 10 to 15 minutes a day, with the exercises in this guide.
Balance is trainable. That’s not motivational language — it’s neuroscience. Your brain continues forming new neural connections throughout your life, and every time you practice balance, you are literally reshaping how your nervous system responds to challenges to your stability. Research shows balance improvement begins after a single training session and continues building over weeks of consistent practice.
You don’t need a gym, a trainer, or special equipment. You need a sturdy chair or counter for support, a safe space to practice, and the commitment to show up for yourself daily. This guide gives you 10 exercises — organized from beginner to more challenging — with clear instructions, progressions, and the clinical rationale behind each one.
Why Daily Practice Matters: The Science
| Research Note: Research on effective balance training programs shows the best outcomes come from 11 to 12 weeks of training, three sessions per week, 31 to 45 minutes per session. Shorter daily sessions also produce meaningful improvements when practiced consistently. One study found balance robustness improved by 33% after a single training session — with continued gains over subsequent weeks. |
The principle at work is neuroplasticity — your brain’s ability to adapt and reorganize. When you practice balance exercises daily, you’re teaching your nervous system to respond more quickly and accurately to destabilizing forces. This adaptation accelerates with repetition and builds across multiple dimensions simultaneously: muscle strength, reaction speed, proprioception (body position awareness), vestibular sensitivity, and the cognitive processing that integrates it all.
Balance training also produces benefits that extend beyond steadiness: research documents improvements in walking speed, reduced fear of falling, better confidence in daily activities, and cognitive gains in attention and executive function.
Before You Begin: Safety Guidelines
| Safety First: Talk with your doctor or physical therapist before starting if you have a history of falls, dizziness or vertigo, a neurological condition, cardiovascular problems, or take medications that affect balance or blood pressure. Stop immediately and rest if you feel dizzy, experience pain, or become unusually short of breath. If symptoms persist, contact your healthcare provider. |
For every session:
- Always have a sturdy chair, counter, or wall within arm’s reach
- Practice in a clear, well-lit space free of tripping hazards
- Wear supportive, non-slip shoes or practice barefoot on a non-slip surface
- Do not practice when fatigued, dizzy, or immediately after a large meal
- Start with easier exercises — progress gradually over days and weeks
- Wobbling is normal and expected. It means the exercise is appropriately challenging.
| PT Tip: If you feel unsteady during an exercise, that’s not failure — it’s information. Your nervous system is working to solve a balance challenge. Safe, controlled wobbling during practice is what builds better balance. The goal isn’t perfection; it’s steady progress over time. |
The 10 Exercises
Exercises are organized from beginner to more challenging. Start at whichever level feels a little challenging — not too easy, not unsafe. Each card includes difficulty level, step-by-step instructions, progressions, and clinical rationale.
| Exercise 1: Single-Leg Stance [Beginner] The foundational balance exercise. Simple, effective, and endlessly progressable. How to do it: • Stand beside a sturdy chair or counter with feet hip-width apart • Engage your core gently and maintain upright posture — shoulders back, head up • Shift weight onto one leg and slowly lift the other foot a few inches off the floor • Hold for as long as comfortable, working toward 30 seconds • Lower with control and repeat on the other side • Perform 3 to 5 repetitions per leg Progressions: → Release the chair entirely once you can hold 30 seconds without touching it → Slowly turn your head side to side while balancing → Close your eyes — only after you can hold 30 seconds with eyes open → Stand on a folded towel or foam pad to create an unstable surface Why it works: Trains the single-leg weight bearing that occurs with every walking step. Strengthens ankle stabilizers, hip abductors, and core. Younger seniors may hold 50 to 60 seconds; those in their 80s may start at 10 seconds — both are perfectly valid starting points. |
| Exercise 2: Heel-to-Toe Walk (Tandem Walking) [Beginner] Improves dynamic balance and coordination during walking — where most falls actually happen. How to do it: • Use a line of tape, tile grout line, or imagined straight line on the floor • Stand at one end with arms extended to the sides for balance • Place the heel of your front foot directly against the toes of your back foot • Take slow, deliberate steps maintaining heel-to-toe contact • Focus your gaze on a fixed point straight ahead • Walk 15 to 20 steps forward, then turn and walk back Progressions: → Count to 3 between each step to slow the pace and increase control → Practice with hands clasped in front rather than arms extended → Try with eyes closed once you can complete 20 steps safely with eyes open → Walk on different surfaces: carpet, tile, outdoors Why it works: Challenges the narrow base of support used during walking. Strengthens ankle and core stabilizers and improves the coordination needed to navigate uneven or narrow surfaces safely. |
| Exercise 3: Standing Marches [Beginner] Builds hip flexor and core strength while repeatedly challenging single-leg balance. How to do it: • Stand beside a chair or counter, holding on lightly with one hand• Stand tall with good posture • Slowly lift your right knee toward your chest, as if marching in place • Hold briefly at the top, then lower with control • Alternate legs for 10 to 20 repetitions per side Progressions: → March without holding onto support→ Lift knees higher with each repetition → Add a 2-second pause at the top of each lift → March at a controlled slightly faster pace while maintaining upright posture Why it works: Each step of a march requires full weight transfer to one leg — exactly the demand of walking and stair climbing. Directly trains the balance system for real-world movement. |
| Exercise 4: Heel Raises (Calf Raises) [Beginner] Strengthens calf muscles and improves ankle stability — both essential for balance recovery. How to do it: • Stand with feet hip-width apart facing a counter or chair back, holding on lightly • Slowly rise onto your toes as high as comfortable • Hold for 2 to 3 seconds at the top • Lower your heels slowly and with control• Repeat 10 to 20 times Progressions: → Perform with no hand support once you can complete 15 reps with control → Progress to single-leg heel raises → Add light hand weights for additional resistance → Try on a slightly inclined surface for greater range of motion Why it works: Strong calves and stable ankles are your first line of defense when balance is disrupted. The ankle is often the joint that makes or breaks a fall recovery. |
| Exercise 5: Sit to Stand [Beginner–Intermediate] One of the most functionally important exercises — directly addresses a high-risk daily transition. How to do it: • Sit in a sturdy chair with feet flat on the floor, slightly wider than hip-width • Scoot forward to the front third of the seat • Lean your chest slightly forward — ‘nose over toes’ • Push through your heels to rise, squeezing glutes and engaging core • Stand fully upright, then slowly lower back to sitting with control• Repeat 10 times Progressions: → Begin with hands on chair arms for support; gradually reduce hand use over weeks → Cross arms over chest once you can stand without hands → Increase speed to improve power once form is solid → Use a lower chair height to increase difficulty Why it works: Research confirms sit-to-stand performance directly predicts fall risk and functional independence. Strengthens quadriceps, glutes, and core — the primary muscles preventing falls during daily transitions. |
| Exercise 6: Side Leg Raises [Beginner–Intermediate] Builds hip abductor strength — the muscles that stabilize you during lateral movements. How to do it: • Stand behind a sturdy chair, holding onto the back with both hands• Stand with feet hip-width apart, posture upright • Slowly lift your right leg out to the side, keeping your toe pointing forward • Lift to a comfortable height — typically 6 to 12 inches • Hold briefly, then lower with control• Repeat 10 to 15 times per leg Progressions: → Progress to holding onto the chair with only one hand, then fingertips, then no hands → Add an ankle weight for resistance once 15 reps feel easy → Combine with a slight forward lean to increase core engagement Why it works: Hip abductors stabilize the pelvis during walking and allow recovery from lateral stumbles. Weakness in these muscles is a significant contributor to falls, particularly sideways falls onto the hip. |
| Exercise 7: Tree Pose [Intermediate] A modified yoga pose that builds single-leg stability and body awareness. How to do it: • Stand beside a chair with one hand resting on it for support • Shift weight onto your left leg • Lift your right foot and rest the sole against your left ankle or calf — never against the knee • Place your free hand on your chest, or raise both arms if comfortable • Hold 20 to 30 seconds, breathing normally • Repeat on the other side Progressions: → Release the chair support as stability improves → Experiment with raising arms overhead→ Close your eyes once you can hold 30 seconds safely with eyes open → Try on a slightly unstable surface (folded towel) Why it works: Tree pose trains the hip and ankle muscles used for single-leg balance while incorporating the relaxed, conscious focus that improves neuromuscular coordination. Particularly good for integrating breathing with balance. |
| Exercise 8: Clock Reach [Intermediate] Challenges balance in multiple directions — training the real-world skill of reaching safely. How to do it: • Stand beside a chair with left hand available for support if needed • Visualize a clock face on the floor around you• Balance on your left leg • With your right arm, reach toward 12 o’clock (forward), return to center • Reach toward 3 o’clock (side), return to center • Carefully reach toward 6 o’clock (behind), without arching your back excessively• Complete 2 full clock cycles, then switch to balancing on the right leg Progressions: → Add ankle reaches — tap your free foot to each clock position instead of using your arm → Increase the reach distance over time → Try without the support chair nearby once 2 cycles feel controlled Why it works: Reaching in multiple directions is how falls actually happen — when we extend beyond our base of support. Training multidirectional balance makes daily reaching, bending, and turning safer. |
| Exercise 9: Single-Leg Stand with Arm Movements (Dual Task) [Intermediate] Adds a simultaneous arm task to single-leg balance — training real-world divided attention. How to do it: • Stand beside a support surface within reach • Shift weight onto your left leg and lift your right foot a few inches • While balancing, slowly raise both arms overhead, then lower them • Or extend arms out to the sides, then bring them back • Perform 5 repetitions, then switch legs Progressions: → Gently turn your head side to side while balancing → Count backward from 20 while balancing → Catch and toss a lightweight ball against a wall → Recite the alphabet while performing the balance hold Why it works: Research shows balance is most vulnerable when attention is divided — exactly what happens in real life when we’re carrying something, talking, or looking around. Dual-task training directly builds the cognitive-motor integration that prevents falls during distracted movement. |
| Exercise 10: Tandem Stance (Heel-Toe Stand) [Intermediate–Advanced] Narrows the base of support to a single-line stance — the most challenging static balance exercise in this series. How to do it: • Stand beside a support surface • Place one foot directly in front of the other, heel touching toes, as if standing on a tightrope • Hold this position for 10 to 30 seconds • Switch which foot is in front and repeat Progressions: → If heel-to-toe is too difficult initially, start with a small gap between feet and close it gradually over weeks → Release the support surface once you can hold 30 seconds safely → Add gentle head turns left and right while holding the position → Close your eyes — only once 30 seconds with eyes open is consistent Why it works: Tandem stance challenges the limits of the balance system by reducing the base of support to nearly zero. It trains the fine ankle and hip corrections needed to recover from balance disruptions in confined or uneven spaces. |
Sample Daily Routines
You don’t need to do all 10 exercises every day. Choose 4 to 6 that feel appropriately challenging and rotate through them. Here are two sample routines:
Morning Routine (10–12 minutes)
- Single-Leg Stance — 3 reps each side
- Standing Marches — 15 reps each side
- Heel Raises — 15 reps
- Sit to Stand — 10 reps
- Side Leg Raises — 12 reps each side
Evening Routine (10–12 minutes)
- Heel-to-Toe Walk — 20 steps out and back
- Tree Pose — 30 seconds each side
- Clock Reach — 2 cycles each side
- Single-Leg Stand with Arm Movements — 5 reps each side
- Tandem Stance — 3 holds each side
| PT Tip: Consistency beats intensity. A modest program you practice daily produces better outcomes than an intensive program you abandon. Aim to practice at the same time each day — linking it to an existing habit (after breakfast, during the evening news) makes it easier to sustain. |
Exercise Snacks: Weaving Balance Into Your Day
Beyond scheduled sessions, brief balance moments throughout the day reinforce the neural patterns you’re building during practice:
| Exercise Snacks: While brushing your teeth: stand on one leg. While waiting for coffee: do heel raises. Whenever you sit down or stand up: make it a slow, controlled sit-to-stand. When walking down a hallway: try 10 steps of tandem walking. During TV commercials: standing marches. On the phone: single-leg stance. These ‘exercise snacks’ take no extra time and meaningfully accelerate progress. |
When to Progress — and When to Get Help
Signs You’re Ready to Progress
- You can perform the exercise with good form and minimal wobbling for the full recommended duration
- The exercise no longer feels challenging — you’ve stopped having to concentrate
- You can complete the hold or repetitions without touching your support surface
When to Consult a Physical Therapist
- You experience pain during any exercise
- You’ve had a fall or near-fall recently
- You have persistent dizziness that doesn’t resolve with rest
- You’re not seeing any improvement after 6 to 8 weeks of consistent practice
- You’re unsure whether an exercise is appropriate for your specific health situation
A physical therapist can provide a comprehensive balance assessment, identify the specific systems contributing to your instability, create a personalized program, and address underlying issues — such as strength deficits, vestibular problems, or medication effects — that generic exercises alone won’t fix. Medicare covers PT for fall risk and balance problems when medically indicated.